Getting started with Xamarin Test Cloud on iOS
In this post we will look at how we can test a Xamarin.iOS app which is based on a storyboard. The app which we are testing is a basic app based on the MVVM pattern. You can find a detailed blog post on the in and outs of the app under test here.
Assuming you already have a Xamarin Test Cloud (XTC) project added to your solution as described in this former post. Lets get started by preparing the app to be tested.
Preparing the iOS for the XTC tests
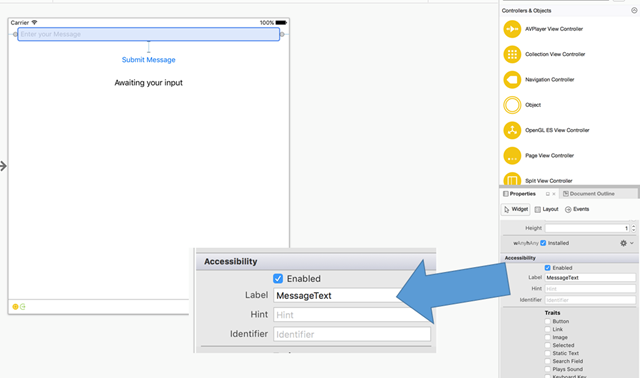
When writing a test with Xamarin Test Cloud the test ideally does not recognize a control by the content it is displaying but rather via an ID which is not visible to the end user but rather a invisible ID. Setting this ID is best done via the accessibility label attribute which can be set in the storyboard under properties:
This ID will not have to change if the locale changes or the UI element is moved to a different location and therefore will allow you to write more resilient test code.
Writing Test(s)
When the UI is prepared accordingly we can start writing the test. One way is to use the XTC recorder. While this tool brings a great benefit when starting of with or smaller apps (as it would be the case in this post), I usually prefer to use the REPL which is easy to use and can be inserted to be started at any point in your code.
The REPL is especially useful once you have a substantial testing framework written because it allows you to execute it after executing some prearranged steps to get to a certain point which you would like to test.
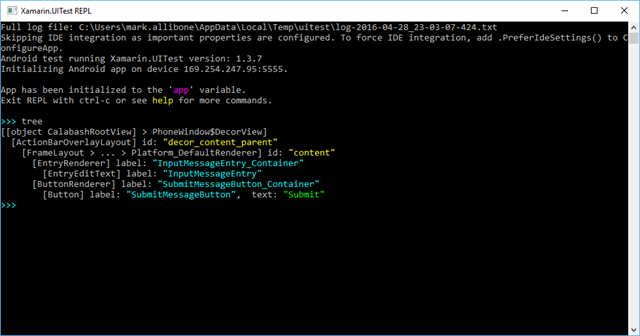
Starting the REPL is as easy as adding the following line to your test method:
You can see the entire apps visual tree nicely outlined.
Now we can define the steps we want to perform in our test:
Note how the test takes screenshots at every stage. This allows to easily identify the steps on the Xamarin test cloud and give them a label. While this might be a bit overkill for such a small sample on larger tests when named right the steps and screen shots will greatly help you narrowing down where an error is happening.
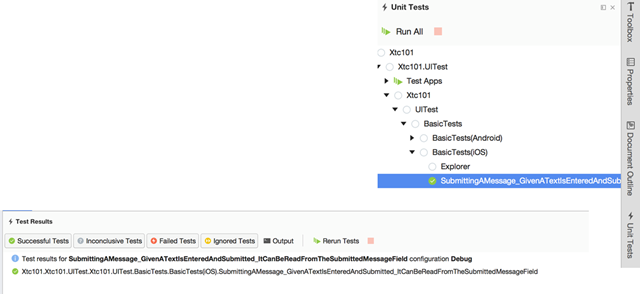
One good thing about the tests is that they also run well on your local machine. So using Xamarin Studio on a Mac we can simply execute the tests over the NUnit Runner:
Or submit it to the test cloud i.e. integrate it in our build process.
Conclusion
This post described how to get started writing automated UI tests with Xamarin Test Cloud for a Xamarin.iOS application. After some minor adjustments to the UI a test can be written using the familiar NUnit testing framework. Keeping in mind that UI tests should not be the only testing you apply to your app since they are rather slow, they do bring a lot of value when used properly since one can easily run the tests on different devices and iOS versions with the Xamarin Test Cloud.
You can find the entire sample on GitHub.


